
By the end of this practical you should be familiar with the basics of building and developing a website using the Ruby on Rails framework. There are a number of links to useful resources on the information page, which you may also want to look at during this practical. We’ll start this application with the basics of the Rails framework, and then move onto integrating database tables into the application. This application will grow over the course to become something larger, which includes examples, which you can use elsewhere.
As we go through the practical remember that Rails uses a Model, View, Controller design pattern with the models tied to database tables, the controllers handle the ‘logic’ of the application, and the ‘views’ determine how pages appear in browsers. This means that:
The model, controller and views each have a similar name. Each method in the controller has a matching view of the same name. You edit the controller to set variables of the model of the same name attributes retrieved (or to be saved) via the database, in a method with the @ symbol, such as @mything, which you can then use in the view of the same name as the variable in the controller.
For example, if you have a controller called bookings, then there will be a model called booking, and a folder of views called ‘bookings’, with pages called index.html, erb to display all bookings, that is called by the index method in the controller, and another called ‘show.html.erb’, which will display and individual booking.
If you’re using Cloud 9, then create a new ‘Rails’ application for this work, and for each of your assessments too. You should NOT use the ‘rails tutorial’ workspace, as this is a special one that doesn’t include everything that you need.
With each workspace on the new AWS Cloud9 you need to match your public key. The solution do this is quite easy. To generate the keys, the command: “ssh-keygen” is needed. Followed by pressing enter three time without specifying anything further.
Rails Basics
We need two separate command prompts when working with Rails. One is for running the web server called puma, and the other is for issuing commands to run various scripts for generating code, and for working with Git.
When building Rails applications you can either do everything by hand yourself, or use its built-in scaffolding scripts to generate code for you. In the longer term, your goal should be to write your own files from scratch. This is what is done in the RailsTutorial, and what professional Rails developers do because it provides more freedom of development, as you’re not removing and changing the auto generated scaffolding code.
We are using scaffolding code as a shortcut to help you learn what a standard Rails application looks like, with appropriate files and other components. By amending and changing the scaffolding code, you’ll see how files are linked together in the model-view-controller framework more effectively than if you were writing everything by hand.
A Note about Quotation Marks
I use single quotes sometimes and double-quotes other times. If you find that one doesn’t work, then switch to the other. Be aware that you probably should use double quotes by default. The Rails Guide uses double quotes in most of its examples.
Session Structure
We’ll start this session by creating a travel agent selling cruises to customers. We start with the general files to manage the navigation and end by creating components to represent the ships and the cabins on the ships.
I’ve used ‘bin/rails …’ commands as it is sometimes necessary to tell the terminal that the ‘rails’ executable is in the ‘bin’ directory. It might be that you don’t need to do this and can just type ‘rails …’.
Step 1) In the first command console be sure that you’re in the directory where you want to hold your Rails applications and issue this command (you can skip this if you’re using Cloud 9 as it’s the same as creating a new Ruby/Rails application in your workspace):
bin/rails new travelagent
This will create a directory named ‘travelagent’ and populate it with a lot of files and directories and is configured to use sqlite for the database. To complete the setting up cd into the ‘travelagent’ directory in your terminal and then run these commands
bundle install
rails webpacker:install
yarn install — missing files
Sort out the Site Navigation
At the moment the site has no home page. If you used ‘rails s’ to start the server, and then went to ‘localhost:3000’ you end up at the ‘Yay! You’re on Rails’ page. Ideally this should put us at a ‘home’ page for the site as a whole. The main application shall run via the ‘travelagent’ controller with the others used as required.
Step 1) We’ll first create a controller that we’ll use as the main controller for the application. We’ll call it ‘travelagent’. Open a console, and run this command to generate the controller:
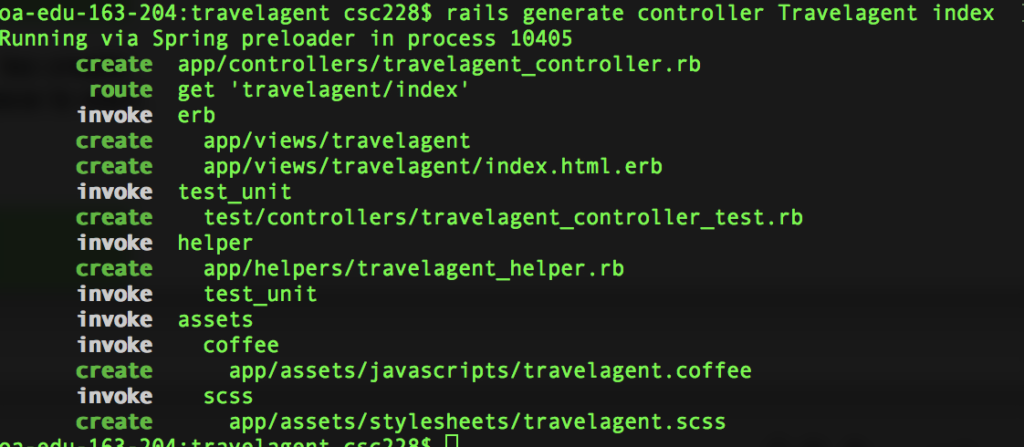
bin/rails generate controller Travelagent index
This will create a new controller called travelagent that has a method called index. It will also create the index.html.erb file for the index method. It won’t have anything in it that we can use, but it’s a place to start.
Open up the app/controller/travelagent_controller.rb file andyou’ll see the code below:
class TravelagentController <ApplicationController
def index
end
end
This is basic enough. If the index method is called, then the user is automatically directed to the index.html.erb page, because each controller method matches an html file of the same name.
The Travelagent controller matches the travelagent folder under views. Similarly, each method in the controller will match a file of the same name in the views folder.
Step 2) Now that we have our travelagent controller in place, we can configure the application to make use of it. Open travelagent/config/routes.rb in your editor. Stop the rails server if you have it running so that changes to the routes file take effect.
You’ll see that our command to generate the controller already added the travelagent/index route for us. Now we can set out different actions to take place depending upon which url is submitted to the server. We want to change what happens if someone goes to the base url of http://localhost:3000/travelagent so we need to configure the option as shown below in bold:
get ‘travelagent/index’
….
root ‘travelagent#index’
The first line is the one added by Rails when we generated the controller. Add the line in bold as shown. The new line will take any request to the travelagent controller index action.
We can check that it works by switching to the other console, and then cd into the travelagent workspace if we’re not already there, and start the server with the command
bin/rails server
If you’re using Cloud 9 under AWS, then Go to https://www.railstutorial.org/book/beginning#sec-hello_world and then follow the instructions from 1.3.2 rails server and you’ll see it’s straight forward with the photos to show what you need to do to run your application.
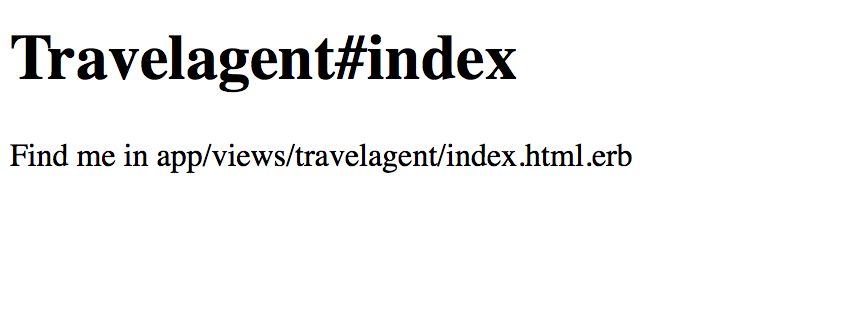
Then go to your browser and navigate to http://localhost:3000/ (or as per Cloud 9) where we should see our new landing page for the travelagent.
Step 3) Our ‘welcome’page isn’t much to look at so let’s fix that by adding some basic code and a few images. Save this code into the app/views/travelagent/index.html.erb file and delete the earlier code that was there. You will also need to save these two images to the travelagent/app/assets/images directory: globe logo.png and travelagentbanner.png. We don’t need to add the usual <html> and <body> tags to the file as these are handled by the template, which we address shortly.
<h1>Travelagent dotcom</h1>
<p>Find us at the Meston Building</p>
This better, but we can do more.
Our site has limited navigation. A user has to know which type of activity that he or she wants to do, before they can get around the site. This is not good. This will not do. We need to add site-wide navigation a common menu, and some better options on the different pages so that we can go from home to cruise purchase. After a few other tasks, we’ll pick up the business logic of the application again at the end of the practical so that users can purchase a cruise.
Step 4) Under app/views/layouts create a new file called ‘_menu.html.erb’. Put this code into the file and save it.
<%= image_tag(“globeLogo.png”, :alt =>”Travelagent.com for your travel needs” ) %>
<%= image_tag(“travelagentbanner.png”, :alt =>”Travelagent.com is your home to arrange the perfectcruise” ) %>
<p>Find a Cruise | Make aPayment</p>
The code is straightforward enough. We put up our two logos and then provide two menu options, which we’ll use later, to get the user started in the application. These image_tags make the images work within the views. It is workable and will enable users to get around from wherever they may be in the application.
Step 5) With the menu available we now need to add it into all of our pages. In some applications this could be a chore. Not with Rails. All we need to do is modify the layouts for the application to ensure that it uses the _menu.html.erb file and we’re done.
Open the app/views/layouts/application.html.erb file and add the line in bold, which calls the _menu.html.erb file.
<!DOCTYPE html>
<html>
<head>
<title>Travelagent</title>
<%= csrf_meta_tags %>
<%=stylesheet_link_tag ‘application’, media:’all’, ‘data-turbolinks-track’: ‘reload’ %>
<%= javascript_include_tag’application’, ‘data-turbolinks-track’: ‘reload’ %>
</head>
<body>
<%= render :partial=>”layouts/menu” %>
<%= yield %>
</body>
</html>
Add in this line just above the ‘yield’ line, as shown above.
<%= render :partial=> “layouts/menu” %>
This tells Rails to include the code from the _menu.html.erb file here. Render means display, and the ‘partial’ implies that it is not a complete file. ‘layouts/menu’ means that it will look for the ‘menu’ partial, and by convention this means any file with the_xxx.html.erb format that matches the word.
Start your server if you’ve not already and you should now see the menu when you run http://localhost:3000.

Yes, you’re right. We could’ve just added the text to the application.html.erb file. We didn’t do that because we’ll probably want to switch menus depending upon who’s logged into the application. Now, we’re set up for when we have admins and guests using the site.
Creating some models
We need to have some models to hold the data about the objects we’re using in the application. This is represented by rows in the database, with each column name being an attribute of the model. For now, we only need a few simple things. We’ll start with the ships of our fleet and the harbours we visit on our cruises.
We now can do a simple one for the ships of our fleet. We’ll start with a fleet of ships modeled by their name as a string, and their tonnage indicated by an integer. Strings are the default datatype so we don’t need to declare that for the name in the command below.
The Ship model we want can be created with the terminal command:
bin/rails generate scaffold Ship name tonnage:integer
As shown below, this will generate the controller called ‘ShipController’ in the file ‘ship_controller.rb’ under travelagent/app/controllers, plus a model and assorted views for the ship too.
We now need to load the migration file into the database with the command:
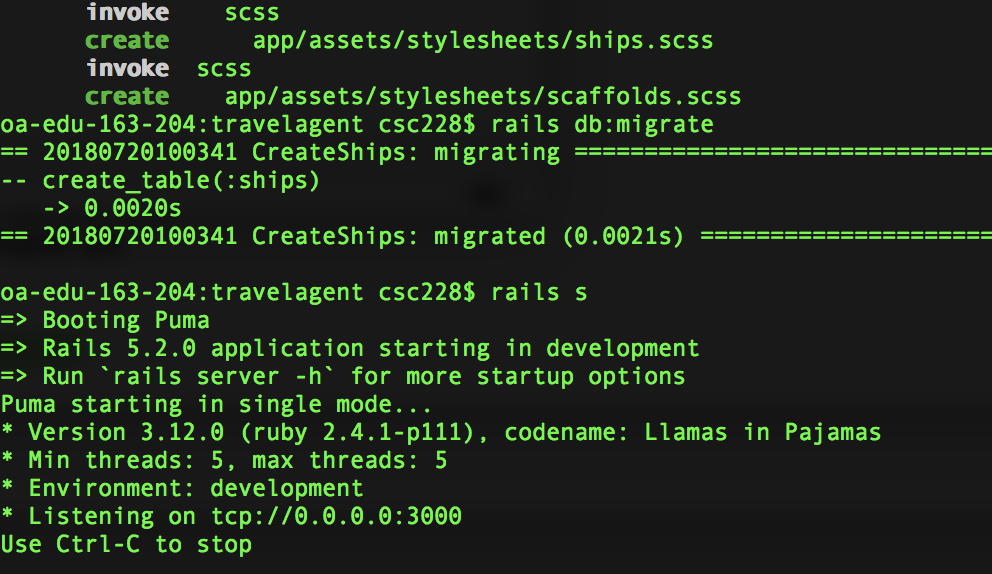
bin/rails db:migrate
We can check that it works by starting the server, if it’s not already running, with the command
bin/rails server
Then go to your browser and navigate to http://localhost:3000/ships where we should see a space to create new ships, and then after you do so, options to show, edit, or delete each of them. Create a few ships and then move on.
The next object we’ll create is harbours that we visit on our cruises. This is where we sail from and places we go on the cruises. This command will create a harbour object with four string attributes. We add the name, its country, and its latitude and longitude so that we could place them on a map later if we wanted to do that.
bin/rails generate scaffold harbour name country lat long
You can see the new files as before, and then run the migration command to change the database.
run ‘bin/rails db:migrate’
And we’re done. Go to http://localhost:3000/harbours to see the link to add new harbours. The lat and long for Aberdeen are 57.14255 and -2.0791805, with the ‘-‘ indicating ‘west’. Add a few more harbours and we’re done for now. Use the lat long if you like, or leave them empty for now. We’ve put them in for now as as placeholder for anything we might do later.
Update the menu
We should update the menu file from the start of the practical to let us see the harbours and list of ships.
Go open app/views/layouts/_menu.html.erb again. Put this code in bold into the file and save it, and then refresh the browser window.
<%= image_tag(“globeLogo.png”, :alt =>”Travelagent.com for your travel needs” ) %>
<%= image_tag(“travelagentbanner.png”, :alt =>”Travelagent.com is your home to arrange the perfect cruise”) %>
<p>Find a Cruise | Make a Payment | <%=link_to ‘Our ships’,ships_path %> |
<%=link_to ‘Our Harbours’, harbours_path %>
</p>
This will let visitors see the ships we have, and the places we go. After you make the changes, then you should be able to see the changes if you refresh any page.
What we did this session
We set up the basic travel agent application with a basic navigation system and two simple models for ships and harbours, which we can use as a starting point for more complex things next week. We also saw how to start the Rails server as part of the flow of app development.
Beyond the Practical
Assuming that you might have some time left you can experiment with modifying travelagent/app/views/layouts/application.html.erb to create a menu to navigate around the different parts of the application.