
This practical adds an authentication system so that only authorised travel agents can use the site, while others are left with a sign up system. To that end we’ll need to first add users, then build the login system, and then enhance this with some extra features.
Create the User
Step 1) We need to have a user to represent our staff before we can do anything else.
rails generate scaffold User name email password_digest
This generates our basic user along with a controller and methods for creating and editing them too. By not specifying data types, name and email are strings, which is fine for our purposes.
Don’t run the db:migrate command yet. We first need to make some changes.
Step 2) We want the user to be validated that the name and email are present, and that the email is unique. So we add this code in bold:
class User < ApplicationRecord
validates :name, presence: true, length:{maximum: 50 }
VALID_EMAIL_REGEX =/\A[\w+\-.]+@[a-z\d\-.]+\.[a-z]+\z/i
validates :email, presence: true, length: {maximum: 75 },
format: { with: VALID_EMAIL_REGEX },
uniqueness: { case_sensitive: false }
has_secure_password
validates :password, presence: true, length: { minimum: 6}
end
The regular expression ensures that we have a proper email address that can be a maximum of 75 characters long. The uniqueness qualifier is not case sensitive and combines with the database migration to ensure that each record is unique. The ‘has_secure_password’ part ensures that it will be stored in a hash, and that it will be confirmed by the form as well. Nor will the user be able to create an account without a password, that it at least 6 characters long.
Step 3) In order for the hashing of passwords to work though, we need to uncomment the ‘gem bcrypt’ line in the Gemfile.
Open travelagent/gemfile to uncomment the gem.
Once you’ve done that, then run ‘bundle install’ to add the new gem and any dependencies to your application.
Step 4) Open the migration at travelagent/db/migrate/xxxxxxx_create_users.rb and add the line in bold to set the user to be unique.
class CreateUsers < ActiveRecord::Migration[5.0]
def change
create_table :users do |t|
t.string :name
t.string :email
t.string :password_digest
t.timestamps
end
add_index :users, :email, unique: true
end
end
Step 5) Now you can run the migration command to add the new table to the database.
rails db:migrate
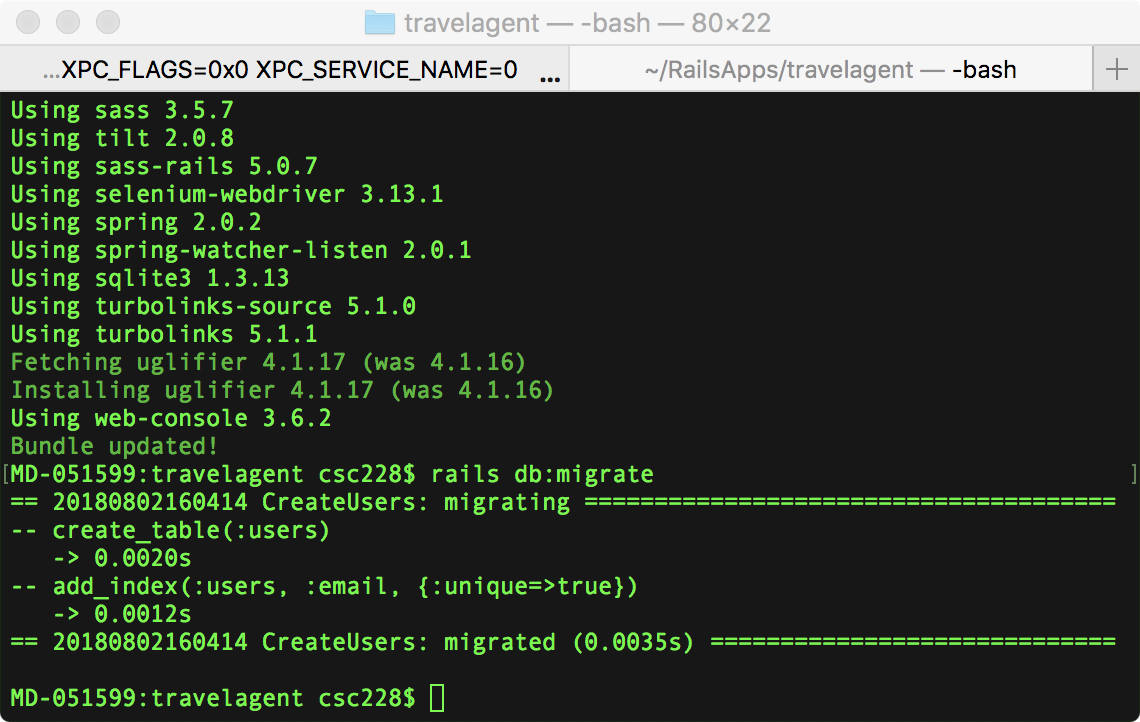
You should see the extra parts about add_index for the details we added to the migration file.
Fix the forms
Step 6) As it is now the user form has a’password_digest’ field, which is not very useful. Instead, weneed it to be ‘password’ and ‘password confirmation’. So open upapp/views/users/_form.html.erb and we’ll fix that. Add the codein bold after the email field.
<div class=”field”>
<%= f.label :password %>
<%= f.password_field :password %>
</div>
<div class=”field”>
<%= f.label:password_confirmation, “Confirmation” %>
<%= f.password_field:password_confirmation %>
</div>
<div class=”actions”>
<%= f.submit %>
</div>
As it now stands this form won’t work due the strong parameters required of Rails applications.
Step 7) We need to open app/controllers/users_controller.rb and add two attributes to the permitted ones for creating new users. Add the code in bold, and don’t forget the comma after :email so that both of these new values are allowed.
def user_params
params.require(:user).permit(:name, :email, :password,
:password_confirmation)
end
Now, you can go give this a try at localhost:3000/users and sign up a new user. This is still only a way to sign up users,and doesn’t provide a login form yet for the system. We’ll do that next.
Side Note: We’re not using SSL here, and to do that you need to set up your own certificates, unless you deploy to Heroku, which let’s you use theirs. You can do this by opening config/environments/production.rb and uncommenting line 43:
config.force_ssl = true
Now when you push this to Heroku, it will use SSL and you’ll see the lock symbol in the browser.
Creating the Login
With people able to sign up on the site, we now need to have away for them to login so that we can hide pages from those who aren’t registered with the site. This will be a basic authentication system based on using sessions to keep track of whether someone is logged in or not, to determine whether they should see a page.
Web pages are delivered from the server via HTTP, which is stateless. This means that it forgets who you are from one page request to the next, unless you feed it some information via a cookie, or a session token. We’ll use session tokens to avoid the situation where cookies are disabled in the browser, and store the session details on the server, which are removed when the browser is closed.
Step 1) We’ll start the session when the user logs in, and delete it when they log out.
Use this command the generate the controller:
rails generate controller Sessions new
This will create a basic controller for us along with a view as well, and add a line in the app/config/routes.rb folder, which we need to change, while also adding two more lines to cover all of the session details. We didn’t generate any scaffolding as we’ll use the user model and other views as required.
Step 2) We need to tell the server how to handle the views though, as we didn’t generate any scaffolding. Open travelagent/config/routes.rb file and change the line “get ‘sessions/new’ ” to match the following in bold.
Rails.application.routes.draw do
get ‘/login’, to: ‘sessions#new’
post ‘/login’, to: ‘sessions#create’
get ‘/logout’, to: ‘sessions#destroy’
If you’re server is running, then stop and start it for these to take effect. We can now move our attention to the login form, which will start the session for our staff.
Step 3) Open up app/views/sessions/new.html.erb and swap this code for what’s there to provide a login form for users.
<h1>Log in</h1>
<p id=”notice”><%= notice %></p>
<%= form_for(:session, url: login_path) do |f| %>
<%= f.label :email %>
<%= f.email_field :email%>
<%= f.label :password %>
<%= f.password_field:password %>
<%= f.submit “Log in”,class: “btn btn-primary” %>
<% end %>
<p>New user? <%= link_to “Sign up now!”,new_user_path %></p>
The final line lets new travelagent staff sign up for an account.
Step 4) In order to have this work we need to put some code into our controller too so that it knows what to do. This will be similar to what you already used for the user page. Add the code in bold to the basic scaffolding of the controller.
class SessionsController < ApplicationController
def new
end
def create
user =User.find_by(email: params[:session][:email].downcase)
if user &&user.authenticate(params[:session][:password])
# Log theuser in and redirect them to the user’s show page.
log_in(user)
redirect_touser
else
# Create an error message.
flash[:notice] = ‘Invalid email/password combination’ # Not quite right!
render ‘new’
end
end
def destroy
log_out
redirect_to root_url
end
end
We have added the create method to login users and send them to their profile page, if successful, or to provide appropriate error messages too. We also added a ‘destroy’ method, which removes the session.
Step 5) You’ll notice that both of these make use of log_in’ and ‘log_out’ methods, which aren’t seen here. The code for those is in the app/helpers/sessions_helper.rb file, which looks like this. You need to add the code in bold.
module SessionsHelper
# Logs in the given user.
def log_in(user)
session[:user_id] = user.id
end
# Returns the current logged-in user (if any).
def current_user
@current_user ||= User.find_by(id:session[:user_id])
end
# Returns true if the user is logged in, false otherwise.
def logged_in?
!current_user.nil?
end
# Logs out the current user.
def log_out
session.delete(:user_id)
@current_user = nil
end
end
Step 6) In order for the controller to find these methods, we need to tell the app/controllers/application_controller.rb to include the code in this helper as part of the application. If not, then the file is ignored. Add the line in bold:
class ApplicationController < ActionController::Base
protect_from_forgery with: :exception
include SessionsHelper
def redirect_if_not_found
Step 7) Lastly, we can add something to our menu so that people know where to login as staff by adding this code in bold to the app/views/layouts/_menu.html.erb file:
<%=link_to ‘Our Harbours’, harbours_path %> |
<%=link_to ‘Log in’, login_path %> |
<%=link_to ‘Log out’, logout_path %>
</p>nb
The last step would be to set up restrictions in our code to only allow those who are staff to see the pages.
Check we have a logged in user
In order to have this work we need to always check whether our user is logged in before we offer up a page. We already have this in SessionHelper.
In order for the controller to find these methods, we need to tell the app/controllers/application_controller.rb to include the code in this helper as part of the application. If not, then the file is ignored.
We can build on this to ensure that the relevant method is always run to check if someone is logged in or not.
Authenticating for page access
Step 1) We want to run the ‘logged_in?’ method each time a page is accessed to see if someone should have access to the page. The current method doesn’t do that so let’s change it. Comment out the line ‘!current_user.nil? and add the code in bold, which will redirect people if they’re not logged_in.
# Returns true if the user is logged in, false otherwise.
def logged_in?
# !current_user.nil?
unless User.find_by(id: session[:user_id])
redirect_to login_url, notice:”Please log in”
end
end
Step 2) This works fine, but isn’t being called yet, so we need to have each controller call it before it allows access to restricted pages. Open app/controllers/application_controller.rb and add this line in bold.
class ApplicationController < ActionController::Base
protect_from_forgery with: :exception
include SessionsHelper
before_action :logged_in?
def redirect_if_not_found
Now, the logged_in? method will be called each time someone clicksa link on the site. But… wait. This could cause a problem,right?
That means no one can log in either. We’ll need to tell the app to allow some pages to be accessed without calling the logged_in? method.
Step 3) We could tell the controller which methods need authentication, but that means we might forget one. An easier method is to reverse this, and say which ones don’t need authentication. This is a much shorter list, and only includes the ‘new’ and ‘create’ methods in the session controller, plus the ‘new’ and ‘create’ methods in the user controller, although you could also argue that only fellow staff should be able to add new staff, but we’ll let that go for now.
Open up app/controllers/session_controller.rb and add this line in bold to the the code.
class SessionsController < ApplicationController
skip_before_action :logged_in?
def new
Step 4) This line now allows all methods in this class to be run without first calling the logged_in? method. Yes, this means we also allow the destroy method too, but that’s probably not an issue as it logs someone out.
Open up app/controllers/users_controller.rb and add this line in bold to the the code.
class UsersController < ApplicationController
skip_before_action :logged_in?, only: [:new,:create]
before_action :set_user, only: [:show, :edit, :update,:destroy]
Step 5) We have one last change to make for our application before we try this out. Open app/config/routes.rb and change default landing page for the application from the travelagent#index page to the login page.
root ‘sessions#new’
# For details on the DSL available within this file, see http://guides.rubyonrails.org/routing.html
end
You need to stop and start the server for the change in the routes.rb file to take effect.
We have now secured the pages from unauthorised access by putting an authentication system in place. Only those with access can see the pages to book cruises, and pay for them. We don’t have any difference between types of user, all are the same in this application.
We could assign roles to users when they register so that they are either ‘admin’ or ‘standard’ user, and then, for example, check which of these they have so that only ‘admin’ roles can create new users. This could be done by adding a column to the user table for roles, so that each user could have one type of role. We’ll leave this for now and move on to seeing what else we can do to secure our site.
Beyond the Practical
We’ve only done a basic login system here. If you want one that is more like the ones you use on other websites, then go look at Chapter9 in the Rails Tutorial to see what more could be done.Chapters 11 and 12 also offer details about account activation and password resetting too. Similarly, look at one of the many tutorials on using Devise and CanCanCan gems to handle users and roles.
Assuming that you might still have some time left, do more work on your assessment site.